Setting up a Quota | Duplicating Quotas | Updating Quotas | Editing Conditions | Deleting Quotas | Bulk Delete Quotas
Study quotas allow a user to control the amount of sample that flows from the Lucid Marketplace to the client survey. Quotas are built off of the questions included in the Qualifications and Targeting page.
In order to include a quota, the corresponding question must be included in the Qualifications and Targeting page.
Setting up a Quota
Quotas can either be setup in Reach while estimating the feasibility of the study, or they can be setup directly in the Marketplace study. For more information on setting up a quota, visit Creating a New Survey.
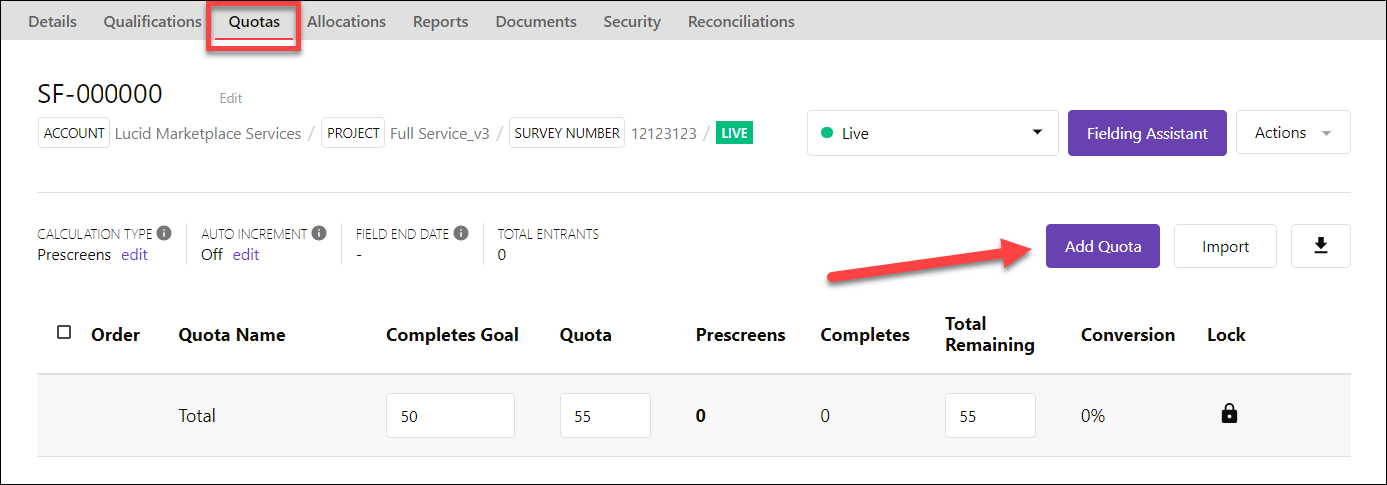
To create a quota directly in a Marketplace study, navigate to the Quotas page within the study and click the "Add Quota" button.

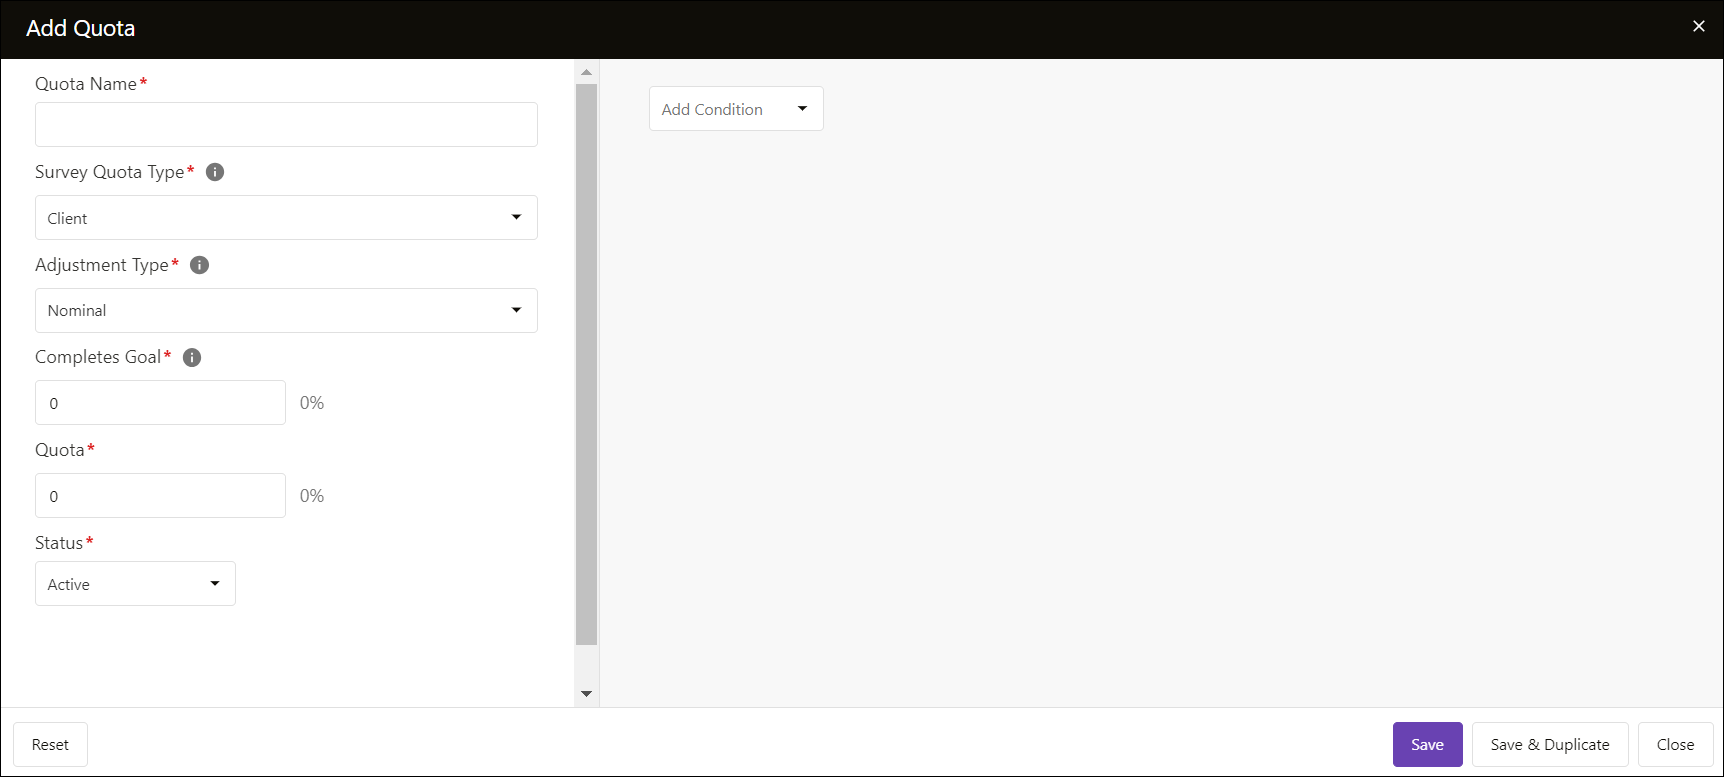
Fill in the information for the required fields (marked with a red asterisk).
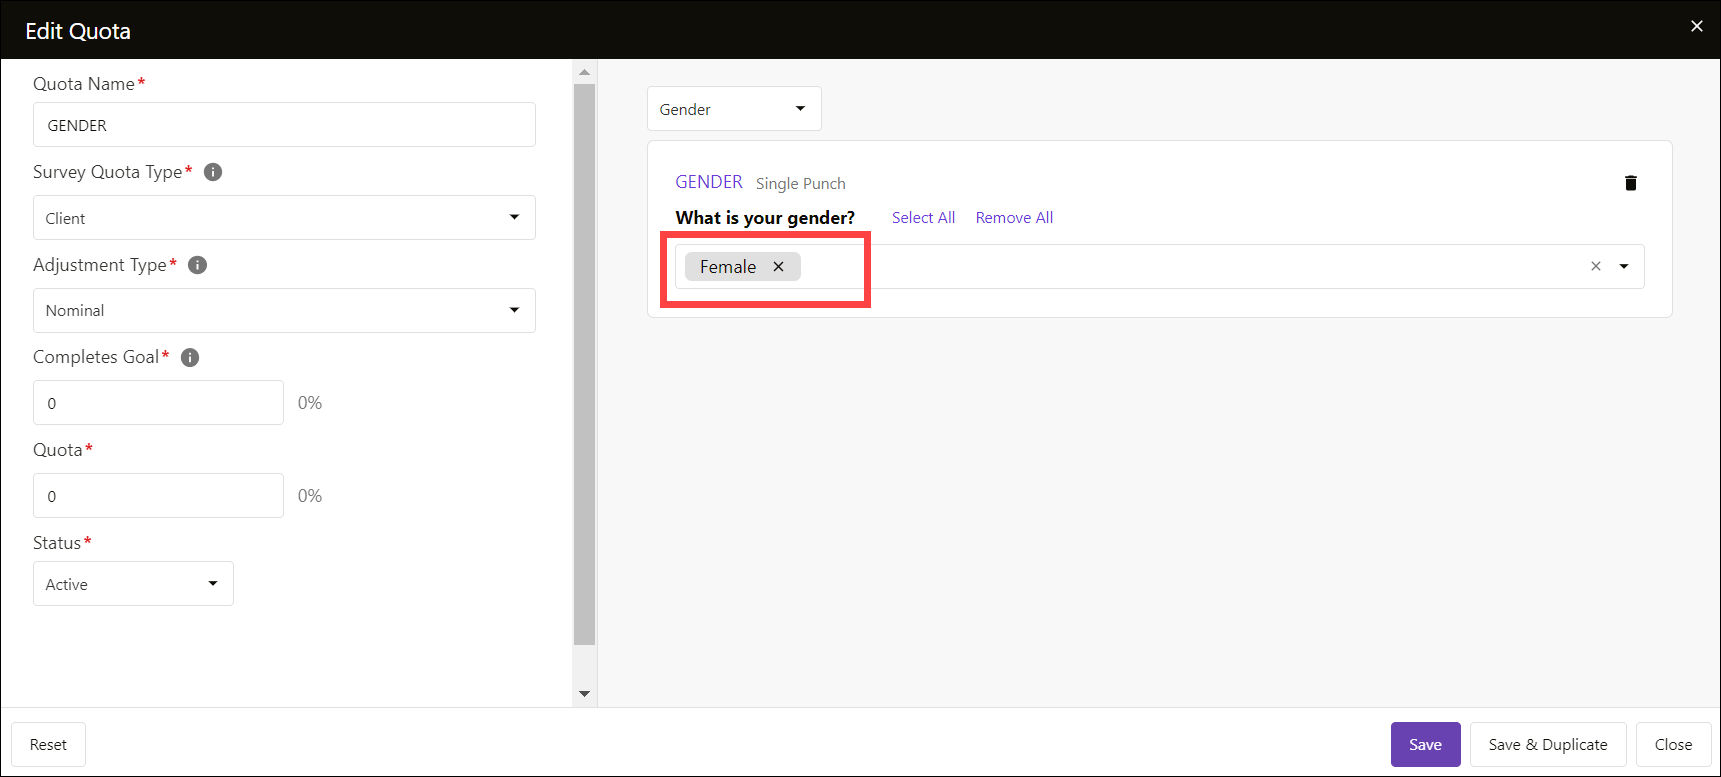
Name: Create a descriptive name for the quota. The example below is a quota for females. If building a nested quota, be sure to include a full description. For example, females 18-25.
Survey Quota Type:
-
Client Quotas: Reflect the end client's requirements, and allows the Project manager to manage each individual required quota cell. The majority of quotas built in the Marketplace will be Client.
-
Control Quotas: Can be used by the project manager to control how a survey fills, within specific quota cells. For example, a control cell could allow only women between the ages of 13 and 17 into the survey. That way, the abundant age group will complete the scarce gender and vice versa. Note: The "Control" quota type should not be used, as this often prevents API partners from seeing all open quotas on a study. Instead you can keep the type as Client and use Control in the name field.
-
Supplier Quotas: Used by project managers to control how the suppliers fill a survey. Often, this type of quota is used to help even the sample distribution from all suppliers. If a survey contains both Open and Restricted quotas, a project manager will choose this type of quota.
Adjustment type: Determines whether the quota will be built as a nominal value or as a percentage of the total quota. Note that the Marketplace will calculate the corresponding value for the opposite quota.
Status: Active or Inactive. Inactivating a quota will make it non-functional, deleting it from the Marketplace.
Quota: The number of completes available for the quota. The majority of the time, the quota value will be equivalent to the Completes Goal value. Using soft-launching is an exception.
Completes Goal: The total quota you want to achieve for the project—example: the total quota for females for the study below is 250. This field is not shown to suppliers, only the currently active Quota. It can be used by tools such as the Fielding Assistant to help pace your Quotas.
Click Save after filling in the required information.

After clicking Save, the quota conditions will populate at the bottom of the screen. Select the qualification on which to build the quota. The example below is a quota based on the Gender qualification. Note that the qualification must be included on the qualifications page in order to build a quota off of it. Select the values for the condition. The example below is a quota for females. Click Save when finished.

Duplicating Survey Quotas
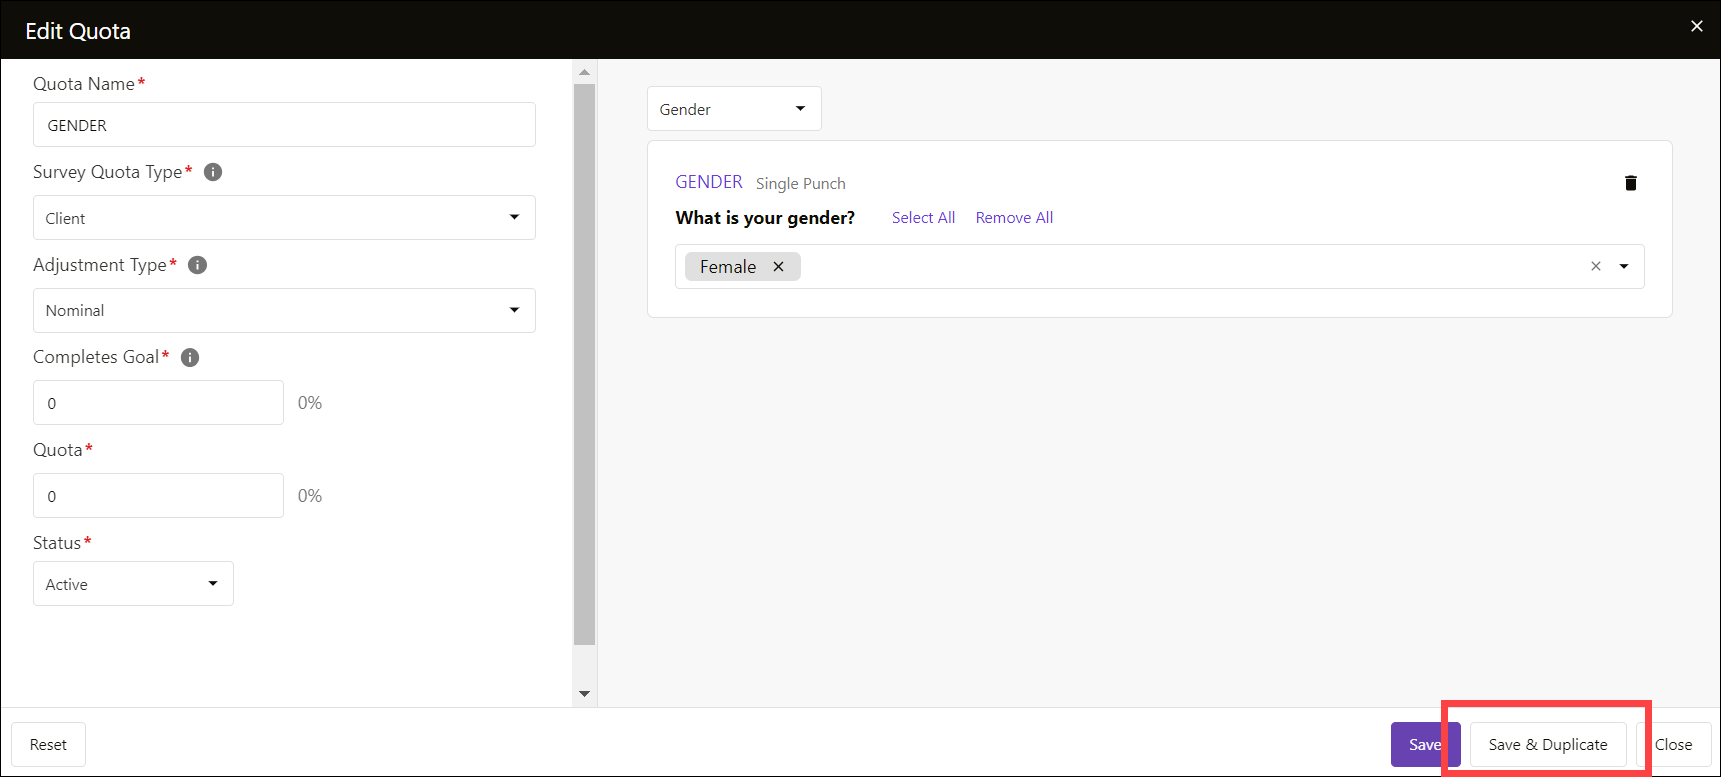
The duplicate function copies all portions of the existing quota and allows for editing. This function is most commonly used when building multiple quotas that use the same qualification. The example below copies the female quota and changes the conditions to males.
To duplicate a quota;
1. Click the name to edit the quota.
2. Update the required survey details, including name, completes goal, quota, and conditions.
3. Click Update and Duplicate.
Note: The name of the duplicated version will change to original name_copy.

Updating Quota Values
To update the value of a quota, change the number in either the quotas box of the total remaining box. The quotas box is the total quota available; whereas, the total remaining is the total remaining completes for the quota (total quota minus completes). Note that the Marketplace will automatically update the opposite value regardless of which method chosen.
After updating the values, the box will become highlighted. Click the Save button at the bottom of the screen to save the values in the quota.
Note: Completes Goal updates automatically whenever it is changed and does not require the Update button to be clicked.
Editing Quota Conditions
To edit a quota, click the quota name on the quotas page.

Deleting/Removing Quotas
To permanently delete a quota, click the checkbox on the right side for the quota and click the Delete Selected button.
Note: Deleting a quota from a study will allow respondents who fit that description to enter the study without any restrictions.
To restrict the respondents, either change the Total Remaining value to 0 or update the qualification on the Qualifications page. For more information on updating the qualification, visit Qualifications and Targeting.

Bulk Deleting/Removing Quotas
To permanently delete multiple quotas, click the desired checkbox on the left side for the quota then click the
Remove button at the bottom of the page.
Note: Deleting a quota from a study will allow respondents who fit that description to enter the study without any restrictions.


